Materials Needed:
1. Ceiling panels of your choice
2. Staple gun and staples
3. Paper cutter and/or box cutter
4. Ladder or step stool
5. Measuring tape
6. Pencil
7. Safety glasses
Step 1: Buy the Right Ceiling Tiles and Prepare Our Workspace
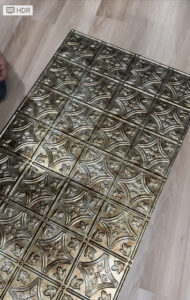
Buying the right ceiling tiles is crucial when doing this type of project. We went for tiles that were lightweight and could be installed by either using glue and/or a staple gun. Also, since we’re using a staple gun, we wanted a color where the staples would blend in. We found the perfect tiles online and were immediately impressed when we first took them out of the box. For the work to get started, we cleared out everything off the floor and placed the tiles in a corner.
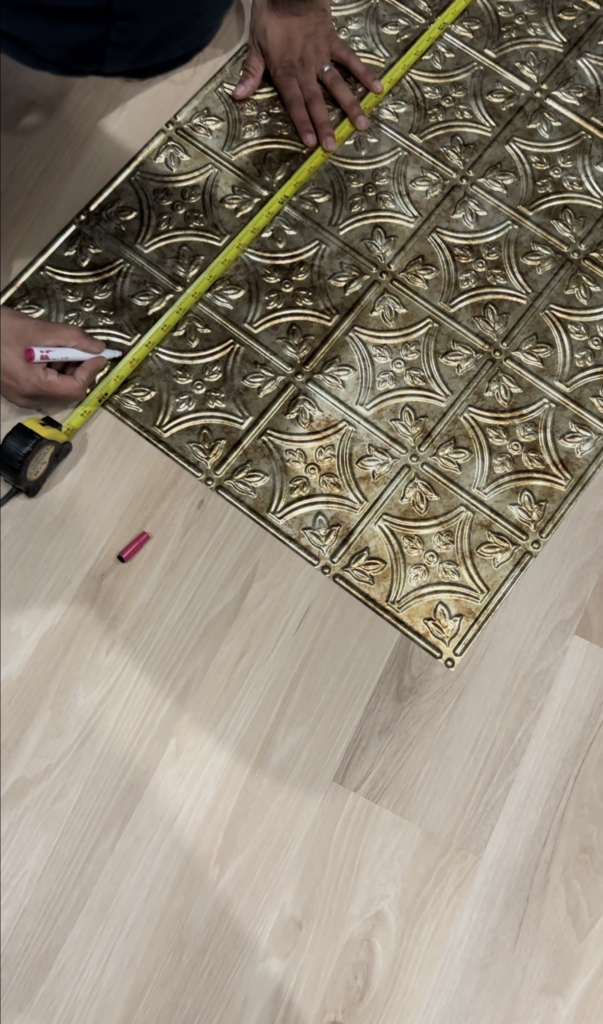
Step 2: Measure and Mark
We measured the ceiling to see how many panels would fit lengthwise and widthwise. Next we marked where to cut on the tiles on the pieces that had to fit on the sides and in the corners.
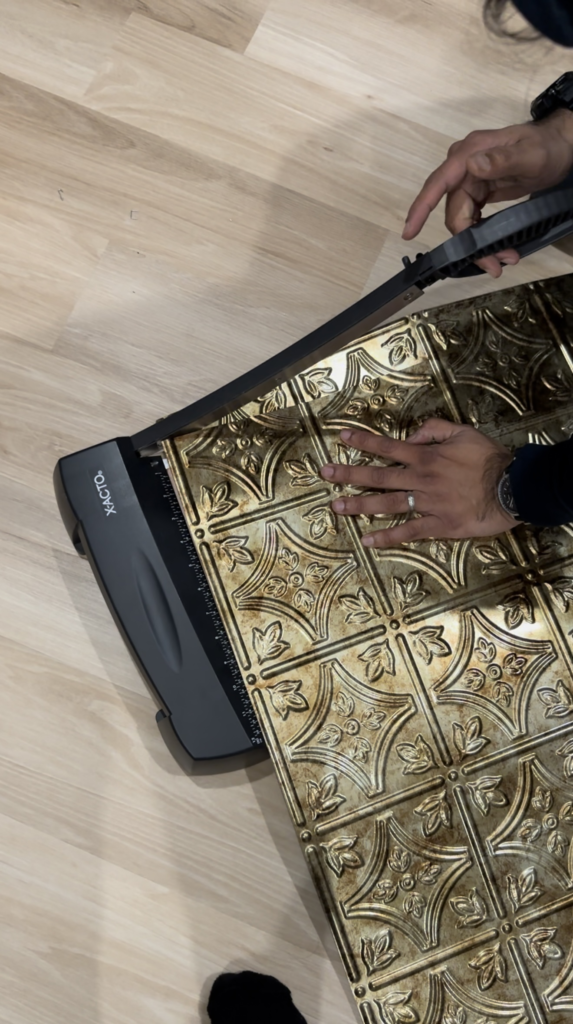
Step 3: Cutting the Panels
Cutting the panels was an easy task. All we needed was a paper cutter to slice them for a precise cut. If the cuts needed to be at an angle, we would use a box cutter or scissors to make the cut. The panels were very forgiving and could easily bend and move to how you wanted to cut them.
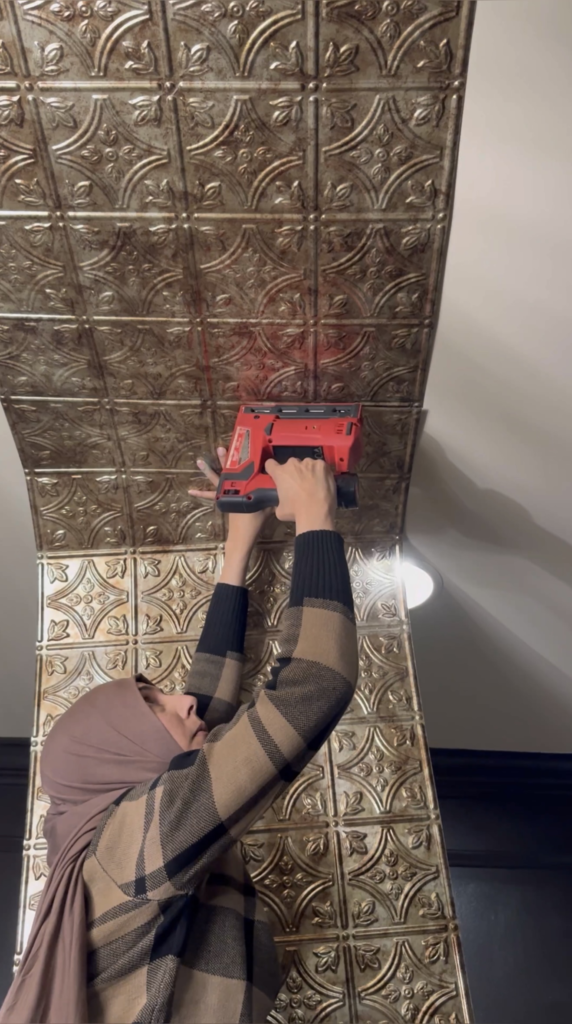
Step 4: Staple Gun Magic
On the ladder with a staple gun in hand, we effortlessly secured the panel in place. Starting from one corner, we stapled along the edges, ensuring a strong hold without overdoing it.
Step 5: Repeating the Process
With each subsequent panel, our fairy tale library came to life. We maintained alignment and continued stapling, creating a seamless flow across the ceiling. If needed, we trimmed any excess materials with the box cutter to ensure we had a seamless fit.
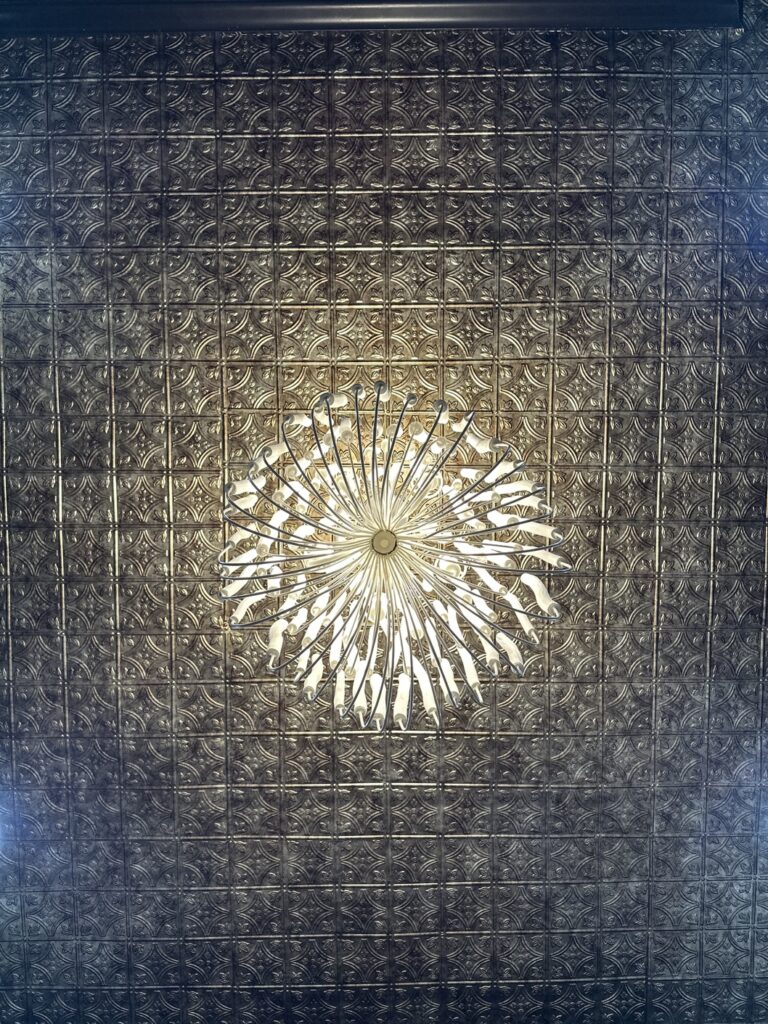
Conclusion:
Our fairy tale library now stands as a testament to DIY magic. The ceiling really added a magic touch to the library, giving it the vibrancy it needed. The surprising part about this DIY was that it only took a staple gun, a paper cutter and box cutter/scissors to install the panels. You too can embark on a similar journey, transforming your space with ceiling panels and the supplies I mentioned. Happy DIYing and decor-ing!